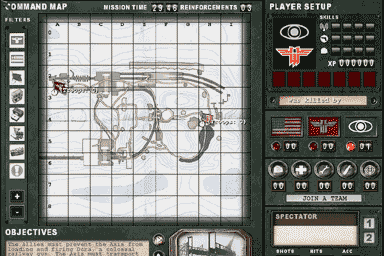
Command Map
***OPTIONAL***
1. Generate a Tracemap to help you make the command map image. (See this tutorial if you don't know how to generate a Tracemap.)
2. Using your favourite paint program (e.g, Adobe Photoshop), draw your command map onto a square canvas (between 256x256 and 1024x1024). This is where the Tracemap (above) comes in very useful.
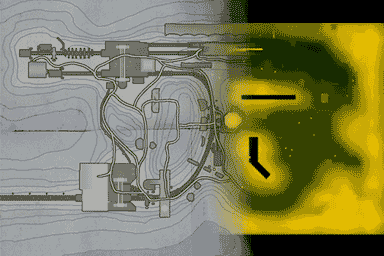
3. Save the image as a 24-bit TGA file named 'yourmapname_cc.tga' in a new directory named 'levelshots'.
4. In your 'scripts' directory, create a new Shader (plain text file) named 'yourmapname_levelshots.shader'. (See this tutorial if you don't know how to create a Shader file.)
5. In your new Shader file, paste the text below (remember to replace 'yourmapname' with your maps real name).
levelshots/yourmapname_cc_automap

{

   nopicmip

   nocompress

   nomipmaps

   {

      clampmap levelshots/yourmapname_cc.tga

      depthFunc equal

      rgbGen identity

   }

}


levelshots/yourmapname_cc_trans

{

   nopicmip

   nocompress

   nomipmaps

   {

      clampmap levelshots/yourmapname_cc.tga

      blendfunc blend

      rgbGen identity

      alphaGen vertex

   }

}
That's it! You can now go and test your new Command Map. (See this tutorial if you don't know how to compile and test maps.)
|