Getting Started
1. I'm assuming you already have Wolfenstein - Enemy Territory (referred to as 'ET' from now on) installed on the computer you're going to be creating maps with. If you don't, this is the first thing you need to do. (See this page if you don't already have ET.)
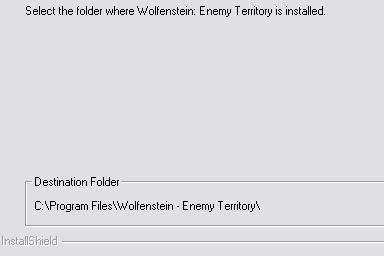
2. Now we need the software you're going to use to create maps. It's called SDRadiant, a variation of an old tool called GtkRadiant, and it runs on both Windows and Linux. You can download SDRadiant here. If you've ever used GtkRadiant before, then you can go ahead and skip the rest of this tutorial. For everyone else, double-click on 'wolfet_tool.exe' to run the installer, and install it to a location of your choosing. The installer will ask for the location of ET, and should helpfully find it automatically. (See this page for more SDRadiant download locations.)
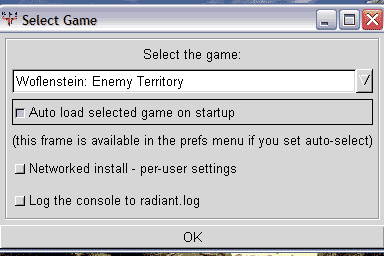
3. When both programs are installed, open up Radiant (it may be named GtkRadiant-1.3.8-ET or similar). The first time you run Radiant, the 'Select Game' dialog box will appear. It should already show ET selected, so just click the box next to 'Auto load selected game on Startup' then click on OK. Now the next time you start Radiant, this box will not appear (but if needed you may still access it from the Preferences menu in Radiant).
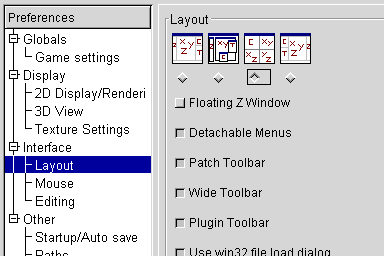
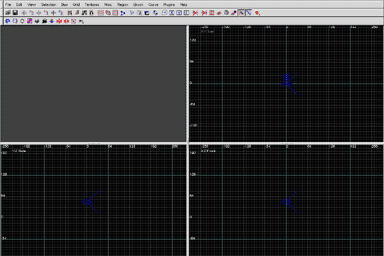
4. You can now run off and create maps if you wish, but we're going to change a couple of settings first to make our work easier. Press P to open up the Preferences dialog box. In the left-column, click on 'Interface/Layout' to see the layout options. At the top of this box are 4 diagrams showing the possible layouts, click the diamond shape underneath the 3rd layout from the left. This will arrange our windows and views so we can see every angle at a glace, and is a much more comfortable way of working, especially if you've ever used any other 3D design programs. If you need to see the other windows (such as the 'console' text that was at the bottom of the screen) simply press T. We'll leave all the other Preferences as default for now, so click on OK in the bottom-right close the Preferences box. A message will appear telling you that Radiant must be restarted before your changes will take effect, just click on OK for now.
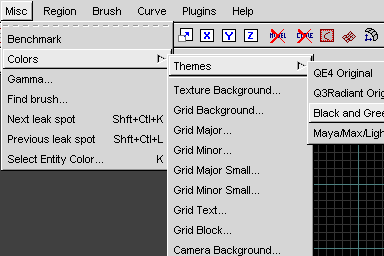
5. Now lets change the colour-scheme. At the moment we have black lines on a white background, and it's not very easy to see the thickness of each line and generally is harder on the eyes when working at length. To change the colour-scheme, from the menu along the top of Radiant click on 'Misc/Colors/Themes/Black and Green'.
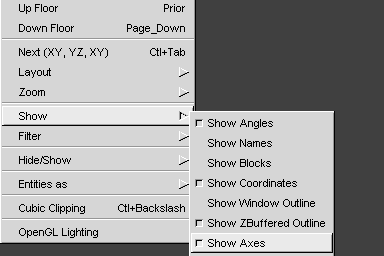
6. Lastly, from the top menu click on 'View/Show/Show Axes' to deselect it. This changes the axes symbol in the top-left of each view, replacing it with a far more meaningful 'Top, Side, Front' labelling.
That's it! Close Radiant then load it up again, and now you're ready to start putting together your map. You'll need to know how to start drawing shapes, so head on over to our next tutorial on Brushes.
|